Installing Debian on a Thecus N5200
How to install Debian Lenny on a Thecus N5200, using an external USB CDROM
Table of Contents:
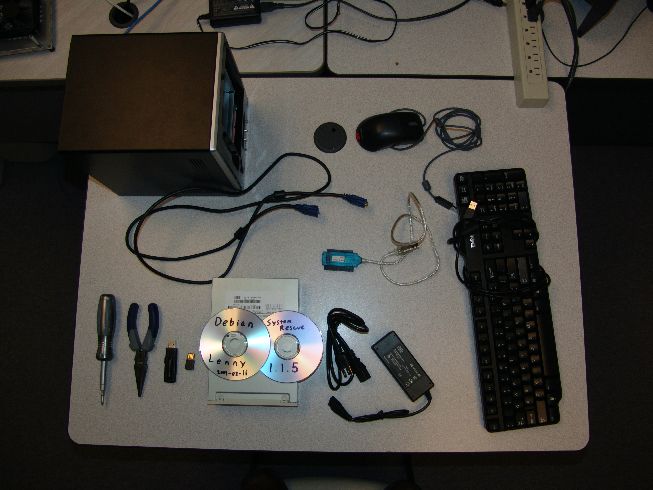
0 Parts List
1 Dissassembly
2 VGA Hack
3 BIOS Tweaks
4 Flash Drive
5 Debian Install
6 Tweaks
7 Further Info
Do not try this unless you know what you are doing. Clearly this could damage your equipment beyond repair. Proceed at your own risk!
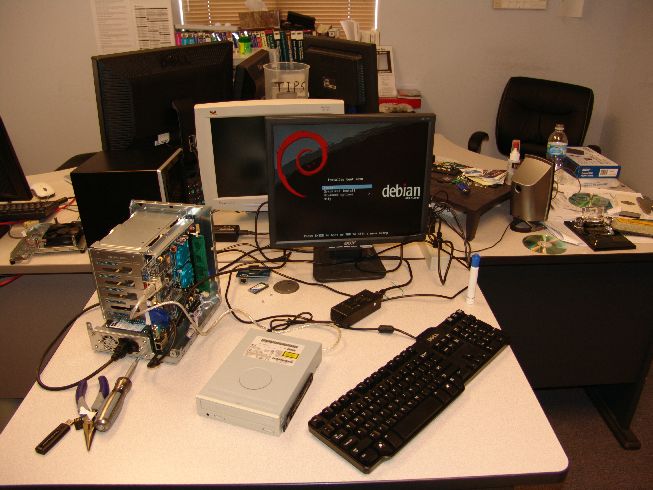
Still reading? Anyway, not many tools are needed for this project. We use a Thecus N5200 (obviously), screwdrivers, pliers, Debian Lenny install disc, systemrescuecd.org disc, External USB CDrom drive, an old VGA cable, and a USB keyboard.
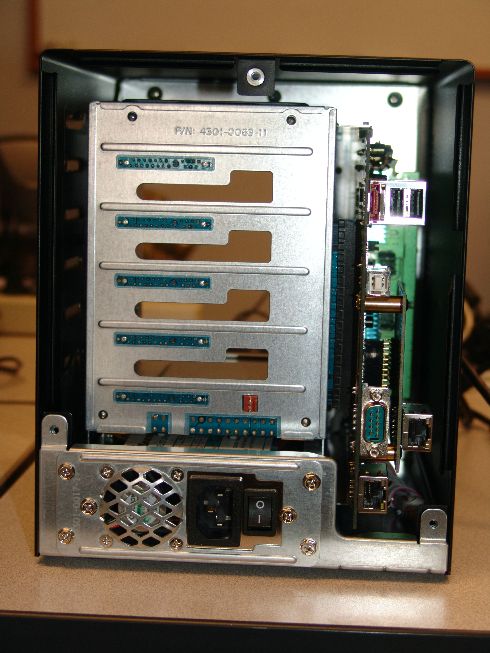
First, remove the rear panel of the case, being careful to unplug the fan as it is removed. Remove the main housing of the Thecus. Remove the two screws from the second gigabit network interface riser card, and set it aside. Remove all SATA drives of course.
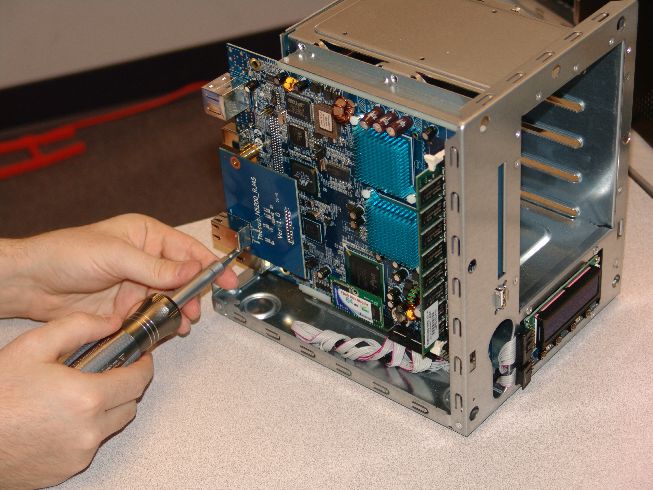
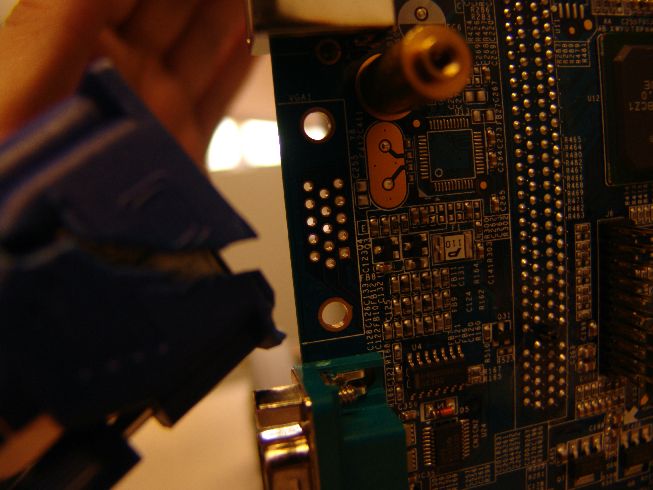
Beneath the gigabit riser card, you will find an array of leads at the edge of the board.
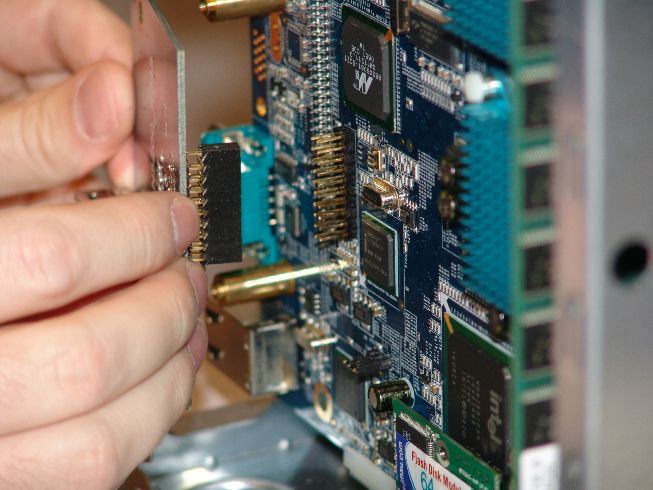
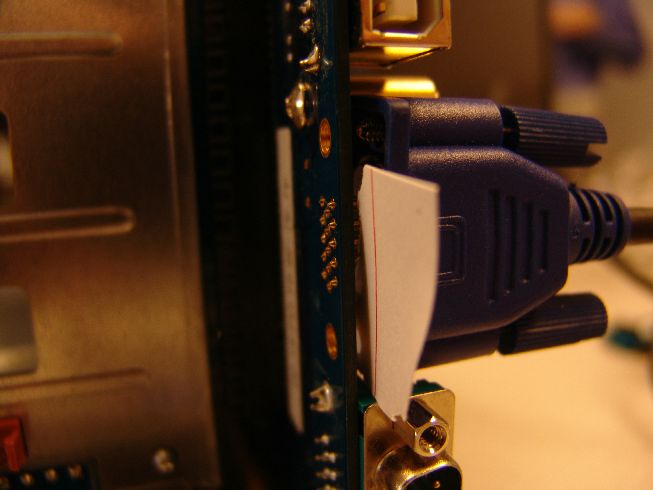
These leads would be where the VGA plug would be soldered into the board. Using pliers and little bit of patience, we were able to create a monitor cable with bare pins, that fit perfectly into the board, giving us a VGA signal. See the pictures below. NOTE: We noticed that the monitor cable was getting close to touching various components on the board, so we created a little cardboard separator to place between the cable and the board.

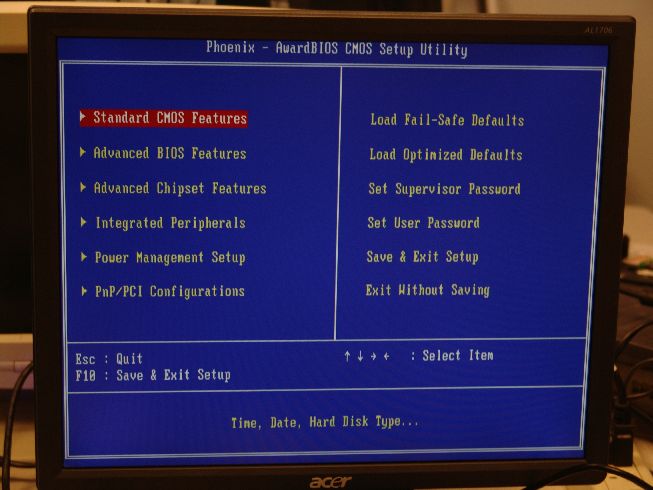
At this point, we were able to boot the Thecus, press the Del key, and enter the bios. Its a pretty standard bios.
We did adjust the boot devices order under the Advanced settings, adding our USB CDROM and USB Harddrive (for later).
We left the internal IDE as a third option. Save and exit.
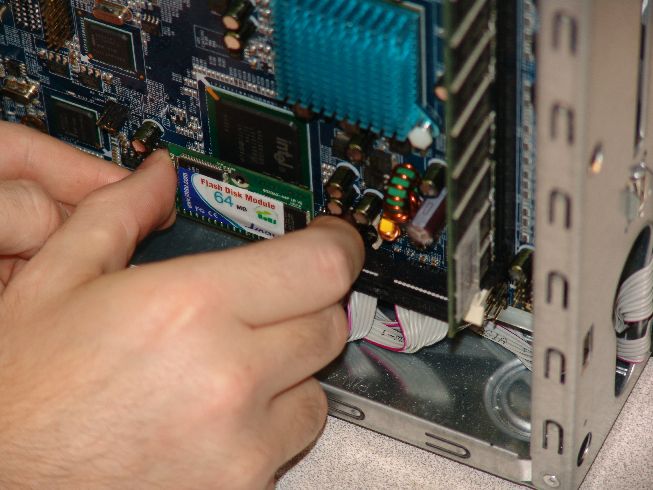
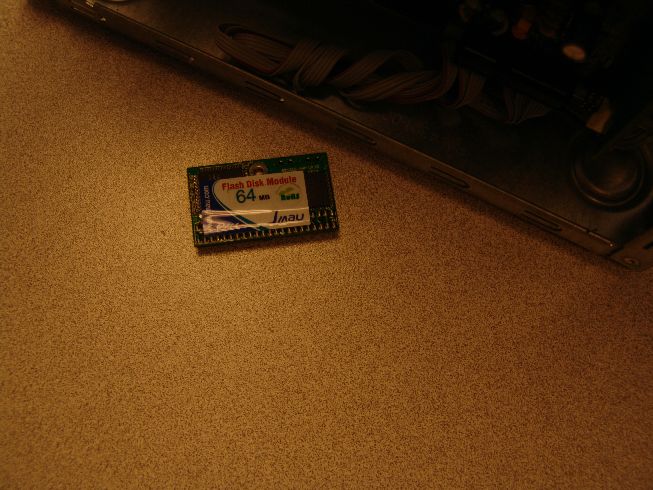
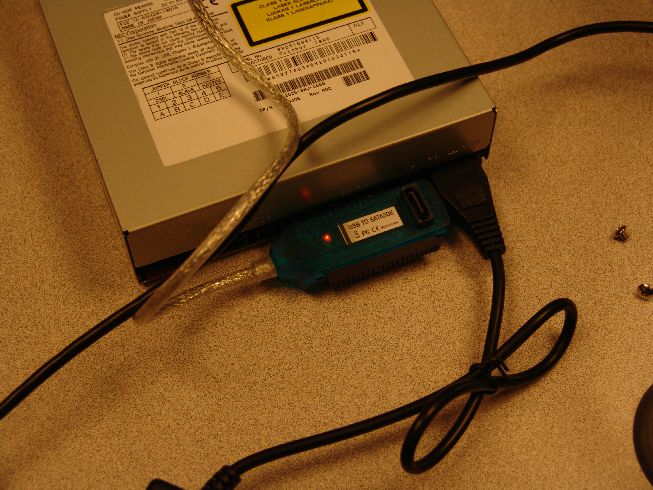
To prevent confusion, and to protect the original OS on the IDE flash memory, we removed it. We found that wiggling it up and down allowed it to be removed easily. We were able to find a very small 8GB flash drive for very little cost, and used that to serve as our hard disk. Understanding the risk of failures, we will have images of the OS drive and incremental config backups to help protect us. Dumping images to pen drives is pretty easy ;) We also cabled up an external USB CDROM drive at this point. The adapter we found supports IDE, SATA, and laptop drives. Very inexpensive also.
We chose Debian Lenny as the OS, as we were familiar with it, and it is easy to maintain. We won’t go into the details of the install, but there are a few points to be aware of:
-
You may have any partition scheme you want on the flash drive, but it is recommended that you do NOT use a journaled filesystem, due to speed/repetitive journal issues with flash storage. We chose a single root partition formatted with ext2
-
create a label on the partitions. This became VERY IMPORTANT, as we found out later that the flash drive appears as an sda device. Things really got interesting once we started installing SATA drives and drive enumeration would jump around based on the number of drives. When the install finishes, you should be able to boot to Lenny. Everything seemed to work for us with no tweaks. At that point, we immediately edited our /boot/grub/menu.lst and removed references to /dev/sda1 and replaced them with root=LABEL=*labelname* . Also, in our /etc/fstab we replaced any references to sda* partitions with LABEL=*labelname*. Reboot, and ensure everything works. If not, use your systemrescuecd to recover the box.
If you forget to create labels during install, its easy to do e2label *device* *labelname* on your partitions
The first tweak to perform is to add ‘noatime’ to the /etc/fstab line pertaining to the partitions on the flash drive. This prevents the Thecus from updating the access time on files that it touches on the flash drive. There are similar options like relatime that help with apps like mutt that rely on atime. See man mount for more info.
We plan to add other functionality, such as LCD control, apply the kernel patches we have found on the net, etc. Check back to see our progress.
Oh, at this point you can re-add your SATA drives and build new partitions if you like.
We were able to reassemble the ‘old’ Thecus drives/partitions with
vgscan -v
mount /dev/dm-1 /mnt/mount/point
That about wraps it up. This is a fairly straightforward hack that will allow you to run Debian in all of its glory on hardware that has a limited distro on it. If you have any thoughts/additions, email them to sclebo05 AAATTT gmail.com. Thanks for stopping by!