Live Trap SMS Alerting Design
I am not responsible for the destruction of property or wildlife. Know your local ordinances when it comes to the capture and release of animals. Use sound judgement.
Table of Contents:
1 Parts List
2 Wiring
3 Programming
4 Setup
5 Lessons Learned
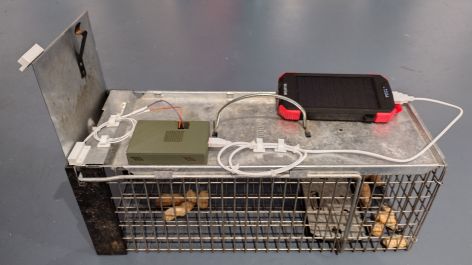
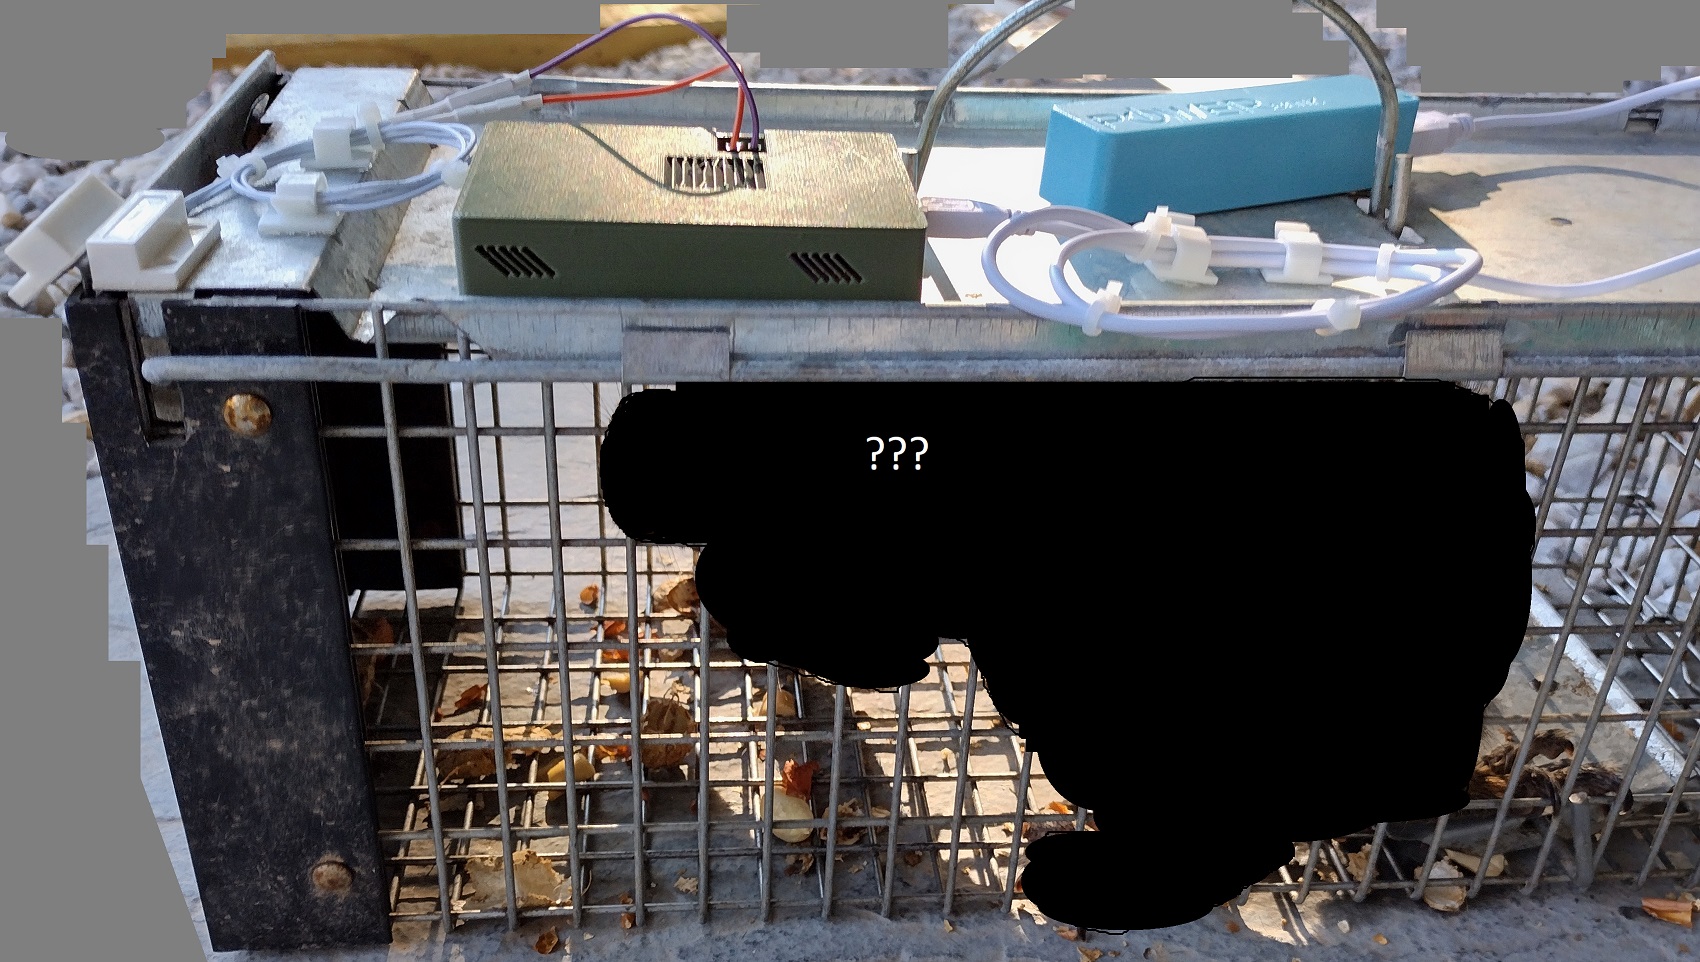
The goal was to recieve an SMS notification the moment a live trap has success. This allowed immediate relocation of the animal without visually checking the trap at regular intervals. Picture of the final product below:
Parts List:
- ESP32 microcontroller with wifi, I used a NodeMCU - $6 - $10
- Reed switch OR contact switch - $4
- USB Battery and cable to power the above
- PCB and wires to connect the above
- Some form of project box, I 3d printed one - $???
- Twilio Account for sending/recieving SMS messages - This costs pennies a month
- Standard live trap. Can be scaled up or down based on needs - $35
- Roasted peanuts, salt free - $3 a bag
Always looking for a project, decided to build a simple notification system that can be used for many purposes. This particular build requires some electrical know-how, soldering, programming, and in my case, 3D printing.
Wiring
It doesn’t get any simpler than this. In essence, an ESP32 microcontroller watches for a reed switch to close via GPIO pins, and sends the text message alert via Twilio. I opted to 3D print an enclosure for the electronics.
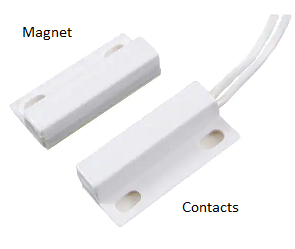
The magic comes from the reed switch. This is a simple device commonly used in home security systems. One component has two small metal contacts that are naturally air-gapped. The second has a simple magnet inside. When the magnet approaches the contacts, they bend and touch, completing a circuit. The reed switch was located on the door of the trap with double sided tape, creating a contact upon success.
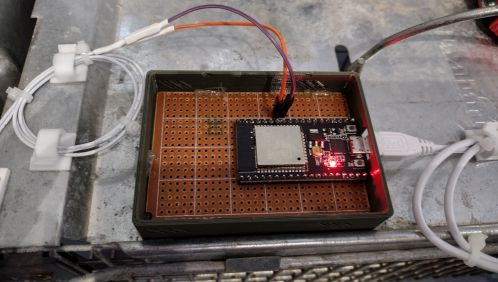
For the enclosure I 3D printed a project box. Using a utility knife I scored and snapped a printed circuit board to fit inside. With a few soldered joints the ESP32 and jumper wires were securely in place.
Programming
The ESP32 supports CircuitPython as well as the Arduino IDE. I chose the latter to quickly cobble together a few existing libraries and get the device deployed. The device connects to my home wifi and then calls Twilio for the alerting. Twilio is a service with callable programming interfaces that function as a cloud based texting service. Call the APIs with the message and destination phone number, and they send the actual text. The main loop of my code watches for the reed switch to close, and then calls the Twilio library to send the text message. The wifi and library setup comprises the bulk of the code. The code is written in a manner that only sends the alert ONCE.
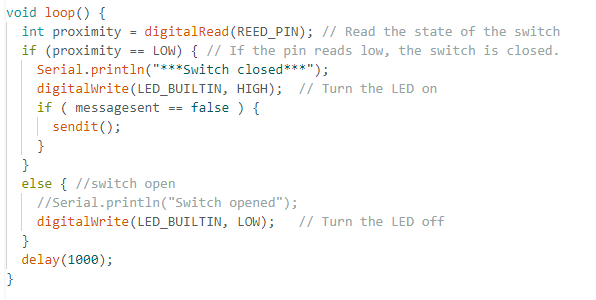
Sample code is: here
Setup
Place peanuts at the BACK of the trap, with a trail running out the front. The squirrels will run off and bury the peanuts outside the trap, and become braver with subsequent trips.
Open the trap door and set the trap as normal. Plug the ESP32 into a standard USB power brick, and you’re set. The power draw is minimal, and even a cheap power brick lasts all day.
Configuration of the Twilio account is beyond the scope of this article. The library within the Arduino IDE handles all of the heavy lifting, the user simply needs to register a Twilio account, select a source phone number and copy the account IDs to the code. Each text message costs something like $0.00001, making this service very affordable. Sample SMS message below:

Lessons Learned:
- The ESP32 is a nice balance between cost and power, occupying the space between an Arduino and Raspberry Pi
- Reed switches have countless uses for home security
No creatures were harmed during the completion of this project.
If you have questions or comments, send them to ‘sclebo05’ -at- gmail