Garage Door Control with an ESP32, Tasmota, and SmartThings
This is a work in progress
Proceed with caution.I am not responsible for the destruction of property or wildlife. Use sound judgement.
Newer Liftmaster garage door openers have MyQ cloud support. It’s possible to use a phone app with the legacy Internet gateway (828LM) to operate the door, but tying that cloud to Samsung SmartThings didn’t seem straightforward. Decided to build my own solution and link to a SmartThings gateway with Matter over local wifi. This howto would probably work with Amazon Alexa or Google Nest with a few modifications.
The overall goal was to have my garage door controller communicate with a local SmartThings hub, and leverage that existing cloud connection to provide app functionality.

Table of Contents
1 Tech Overview
2 Items Required
3 ESP32 Config
4 Wiring
5 Adding Tasmota to SmartThings
6 References
Tech Overview
The goal is for this build is twofold: report the garage door state, and provide a means to change that state. These two functions will be independent, but are able to be viewed or changed via the SmartThings phone app. Routines can be written to automate as desired, for example “If garage door is open after 11:00pm, close garage door”
An ESP32 running Tasmota communicates with the SmartThings hub, and reports whether the reed switch is open or closed. If a change in the door state is requested, the ESP32 fires a relay to simulate a button press to initiate door action.
Most older garage door openers have a set of contacts that if closed, trigger action on the garage door. On some newer ‘secure’ garage doors, only a signal from a wall panel or wireless remote can trigger door action. In this howto, my relay will be connected to a wireless remote, but know that it could be wired directly to contacts on an older model.
The SmartThings hub is leveraged to send notifications and automate routines.
Items Required
Items Required:
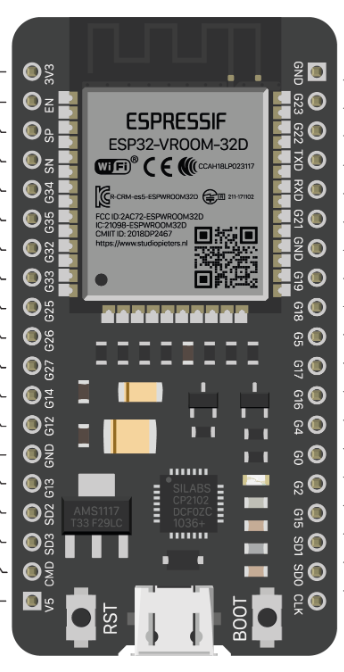
- ESP32 microcontroller - I use a 38 pin ESP-WROOM-32 dev board with pin headers - $4
- Relay Board - 5V input fairly commond relay board - $5
- Garage Door Opener - $10 knock-offs are available
- Case - use a $10 project box, or 3D print one
- Reed Switch - $3
- Wire, bell wire or Cat5 - $10 for a bundle
Prices are rounded up, if you have bins of components like I do, you may have some of the above laying around.
ESP32 Config
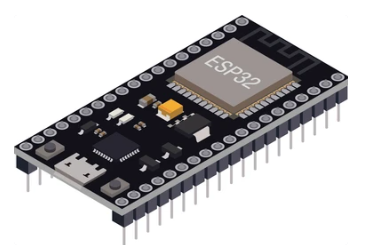
Find yourself an ESP32 microcontroller on a dev board, and get it programmed with Tasmota https://tasmota.github.io/. Keep in mind that you need an ESP32, as an ESP8266 is not supported at the time of this article. The web browser based installer works great for an initial flash. I’m using Tasmota 13.3 in the examples.
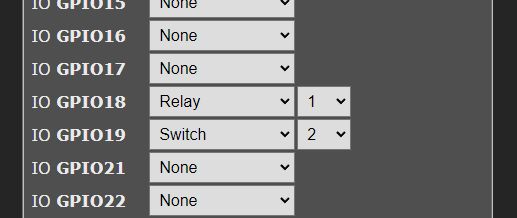
In Tasmota, browse to Configuration -> Configure Module. Set GPIO18 as Relay 1, and GPIO19 as Switch 2. The pins and values used do not matter as long as you keep track of the values used. Save your config and jot them down!
From the Main Menu again, go to Consoles -> Console. Run the following commands:
SetOption114 1
PulseTime1 5
SwitchMode2 2
Option114 decouples Relays from Switches, as we will have two separate devices (a reed sensor and an independent switch). PulseTime is the duration to toggle the relay, and SwitchMode sets switch2 to inverted follow mode (0 = ON, 1 = OFF)
Tasmota has a ton of config outside of the scope of the howto, but I often set the following:
SO53 1 = show hostname and IP
SO146 1 = Display internal temp
SO08 1 = Temp in F not C
... and many others
Check out Tasmota docs for further info.
Wiring/Pinout
I purchased a garage door opener clone and paired it with my opener. One difference I found with this opener is that instead of tapping the button to open the door, I had to hold it for half a second. Easily doable with our relay setup. On my 3 button remote, I paired the third, largest button to my opener, but you could probably use any of the three. Pins for Relay and Reed Switch (Contact) picture of wiring
Adding Tasmota to SmartThings
This howto uses the Matter protocol to link the ESP32 to SmartThings. Start by logging into the Tasmota interface on the ESP32 and navigating to Configure -> Configure Matter. Check the …
Now we need to ensure the sensors are added to Matter for sharing.
More information surrounding Tasmota’s Matter support can be found here
Linking Tasmota to SmartThings via Matter is fairly straightforward. Start by adding a new device to SmartThings. Select Partner Device -> Matter. The phone will request a QR code - point this to the QR code displayed on the Tasmota device. Once scanned the SmartThings app will confirm that you wish to add a unknown manufacturer. This is acceptable, as the Tasmota/Matter stack is an open source project and not technically a vendor.
The app should now display the Garage Door Relay and Garage Door Sensor (our Reed switch). The first will show the door status, the second will allow you to trigger the garage door. Normal SmartThings functionality will apply in the form of creating Routines and sending alerts.
References
Many thanks to the below
Espressif - their ESP32 devices provide a great platform for my projects
Tasmota - Provides a consistent interface to the ESP32, allowing one to focus on implementation instead of chasing documentation
Digiblur - the idea of leveraging an existing remote came from here; adapted to my model of remote
If I missed any references or any of the above is in some way incomplete, reach out and I’ll attempt to remedy.